Sunday, June 3, 2018

Monster Multi-trunk Boxwood (burn pile)


Monster Multi-trunk Boxwood 


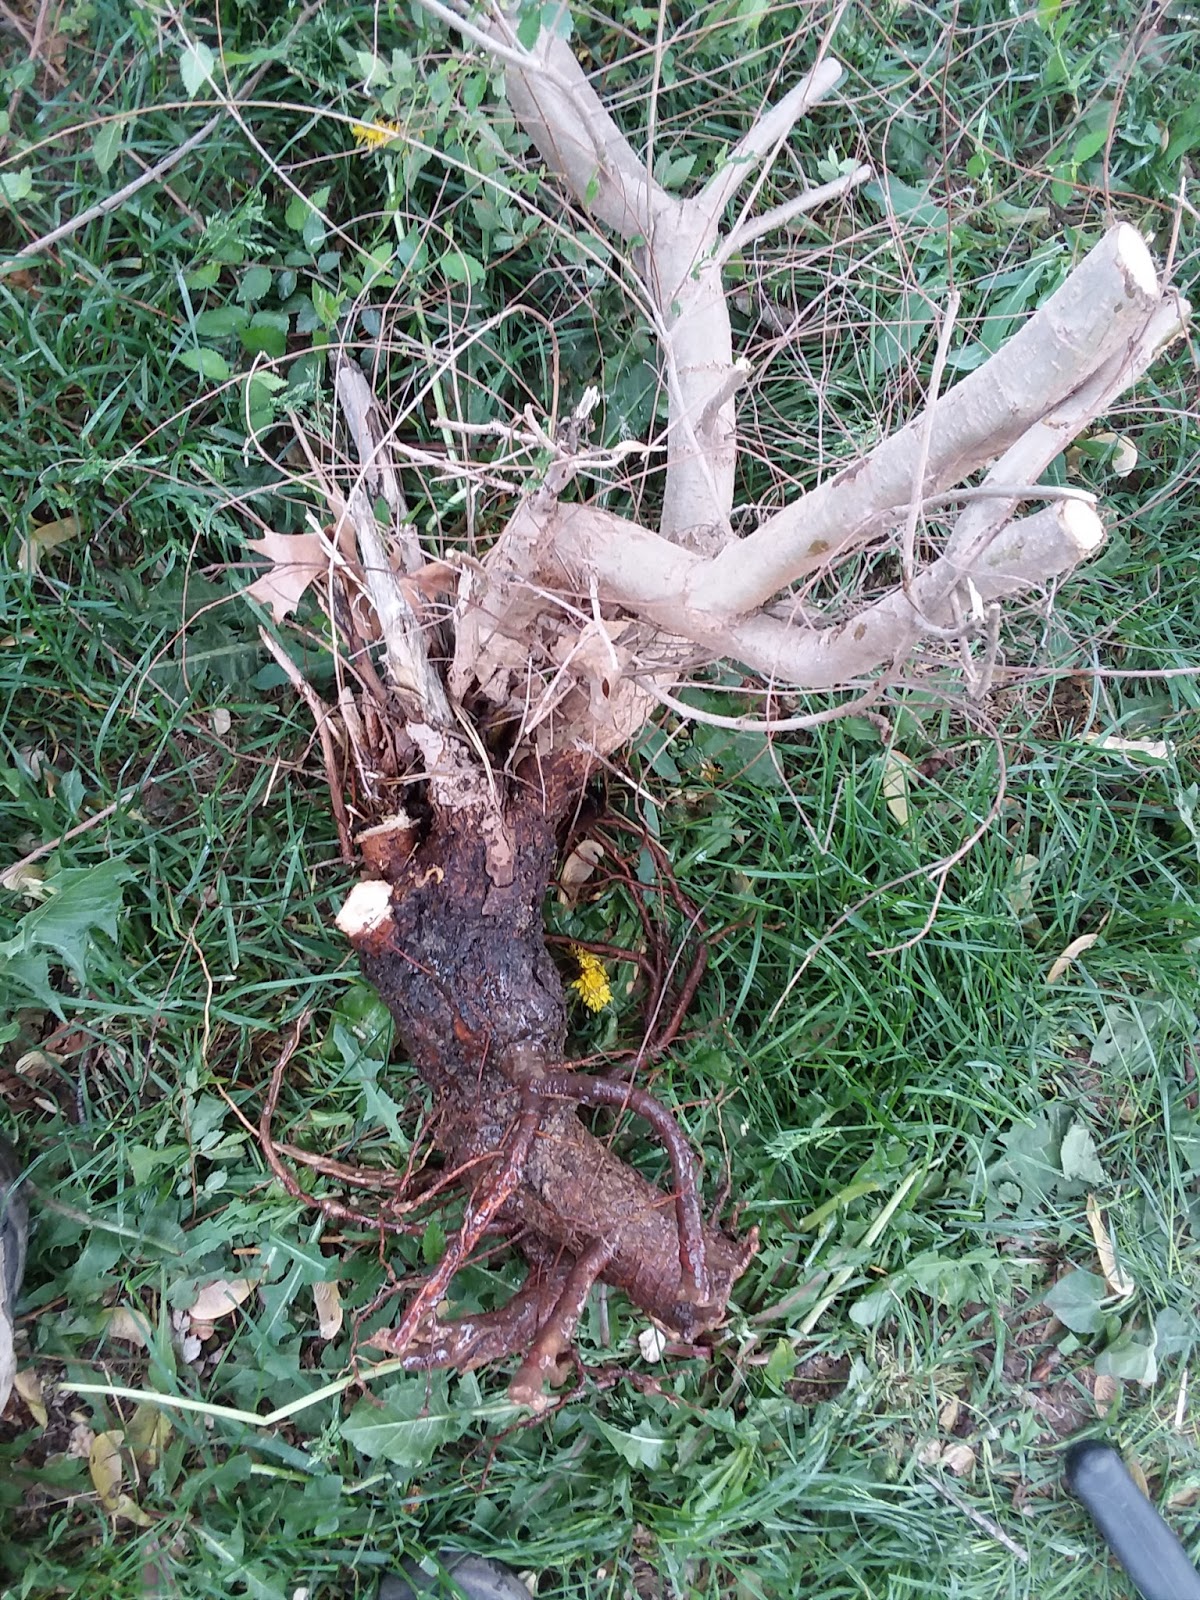
This is a boxwood is a single plant and sizable shrub.  The digging was pretty easy, but cramped with other garden plants and the concrete slab.  Before digging I lied down and took the below image.  There are many trunks emanating from one central trunk.  The branches on the left side of the image could be developed.  


Here is the boxwood, wider then my car. It was pretty heavy despite brushing off most of the soil.  I dragged it from the backyard and planned to thin out some obvious poor branches, to lighten the load.  


Here it is thinned out a bit.  I had to use a strap to hold the swinging trunk closed.


Below is the tree before I began work.


Based on my knowledge of boxwood and what I found in recent research.  My plan was to keep some lower branches and eliminate any crossing and dead branches.  In doing this, I can open it up and allow light to penetrate the interior of the branches, and hope for back-budding on the older branches.  It ended up looking really leggy, but that was essential. Keeping the green growth on the ends of branches ensures the survival of each branch.  
The plan is to see how the tree responds and then cut it back more drastically once new growth forms on the interior.  
Another thing about box is that it takes a really long time to grow out branches, so I will be slow in deciding which to keep because they can not be regrown easily.


Below is the pile of branches cut off, with another the same size cut before I loaded it to transport it home.


Some scale with a 16oz PBR.


Below, I began reducing the root ball and bare-rooting the boxwood.  Boxwood typically has a nice shallow root mass and this it the case here.  There are nice fine roots.


A potted it up in a big yellow recycling bin, the biggest thing I had on hand.  It was filled about one third of the way with soil.  Below is the boxwood with the bonsai bench.


Below the movement of several trunks can be seen.  Boxwood can have boring straight growth so I plan on utilizing some of these wavy branches which move from center to right in the image below.   


Here are two images that show the girth of the trunk(and a bit of damaged bark from the long day).


In this image you can see the green tips and the leggy growth.  I am wishful that it will back but well and fill out the interior.  By next spring perhaps I can consider cutting it back some.  Repot planned for 2020.  


RIP:
This Tree did not make it!! the leaves quickly dried out despite being in partial shade and being watered well.

Lessons: either don't bear root and leave it in its soil surrounded by substrate.
Or instead of trying to keep the live veins going by keeping foliage, perhaps I should have cut in  back hard and let buds regenerate when the tree could sustain them in its own time  

Saturday, June 2, 2018

Siberian front fence rescue (burn pile)


Siberian Elm

This is the first collected Siberian Elm, the one that got me thinking about this invasive as potential, since it was collected as a weed along my fence line.
On the left side of the image you can just about make out the original cut made by the previous tenant.  Last summer, I cut back the branches branches and got thinking about digging it out.  It kind of has a windswept feel, although not best seen in this image.
RIP: this tree did not recover after the winter of 2018-19

Soil June 2018


SOIL

After running out of soil and desperately needing some after some weird incidents with some of my trees (puppy attack), I decided to get a new batch made.  I have not tracked down a Turface supplier so I am working some new additions.  I read about using a product called dry stall which is pumice, so I went to a farm supply store.  They did not have that product by an alternative which uses zeolite.  There are cute barn animals on the packaging so it must be good! From what I read it seems in a similar vein as diatomacious earth and Turface in that it holds water well and slowly releases nutrients. DE and Turface are more clay based while Zeolite is silica based.  A caution is that if can raise the pH a bit if too much is used proportionally. About 30% is recommended.  


I got a 40 pound bag for 5 bucks, w/ a discount for the bag being ripped.  It was really dusty so 1/3 of the bag or more was sifted out. 


DE from the auto parts store was around 6 bucks too.  I have used it in the past.  the interesting thing was the an equal amount of it in my sifter was half as heavy as the zeolite.  There was also way less fines and dust to sift out.  


I tossed in the rest of the wood mulch that I had left over from the spring repotting.  This will help with the balance by adding some acidity.  


I had some left over DE, but will probably sift it and add it too, to help with the pH.
It has been wet and mild I may try to keep an eye out for some yard collection opportunities, especially since I am out of school...

Lilac dig

Lilac Dig

Someone answered by craiglist ad, but didn't send me any photos, so I took the chance and went out there.  She showed me around for 15 minutes pointing out all manner of things but is was all spindly, or ill suited for bonsai.  The best things were two lilacs. The sandy soil made for quick digging.  After a half dozen wacks with my pick ax I was able to pull out each one.  The leaf size will be an issue, and it would have been better to collect one with more girth, but these were the best available.  

l.o


Above is the first one.  It was storming outside so I worked in the shed.  I left some leaves on each of the branches that I kept.


This second one has a nice wound that adds some visual interest.  There where roots at three different levels.  I trimmed the small roots on the trunk and reduced the larger roots in the middle.  The lowest ones I cut off with a flat cut through the trunk.   


It seems to have enough roots to be OK, and some gentle movement in the lower trunk.


Here they are potted up.


Update: June 2018 
The "escaped rottweiler puppy incident" had these two trees tipped over and all the soil removed.  Along with that one of them (left tree in above image) has been repeatedly had its trunk base chewed by squirrels.  

Here is the one that  survived in mid-May of 2019


Below: Oct 2019

After only putting out that first flush of leaves and not growing much despite heavy feeding, I was surprised to see this new growth layer in the growing season.  Next year, I may try defoliation to reduce leaf size.


Saturday, May 12, 2018

Siberian elm urban yamadori #3 (burn pile)

Siberian Elm - Urban Yamadori  #3


Above is the tree before I cut it back and started digging.  You can see the previous cut made by the property owner, but these elms grow like weeds here... are weeds here, and responded with new shoots.  The thick branch on the right of this image will be designed as the new leader.  Much of the tree was below the soil surface.

Below is the shot of the taproot.  There were not too many fine roots, but hopefully enough to ensure survival.


Here are all three trees loaded up in the car.  It was short drive - two blocks, but I put them in plastic bags because there was no rootball on any of them, and I knew that I would be digging for a few hours ( it took only two surprisingly).


I put them in this bin to soak and buy me time to make some lunch.


 Below, you can see where I choose to reduce the root mass at a collar of roots.  Anything lower was too thick, having been cut on site to remove the tree, and lacked feeder roots.  Also, note the already cut root on the pallet next to the saw.  It was way too thick and was also damaged in the removal of the tree.


Although I liked the character of the thicker main trunk, the shoots growing were not in the best place.  I also wanted to treat it like a field grown tree that had an initial chop and now was ready to be cut back to the new leader.  Which essentially it was.  In the next two images you can see where the bark was damaged, and essentially ripped off.


With that large root cut off, the wound is large.  Hopefully, some roots will form around the wound and add to the taper in the future.  Notice also the new leader cut back to a few inches.  The top part I potted in sphagnum moss to see if it would root.


I potted this tree up in a nice blue pot that was unused in the shed. It should complement the leaves as the tree develops.  I put in it pure diatomaceous earth, as an experiment, to see which of these trees responds better to collection.  They all had about the same amount of viable roots.  The others were planted in my typically mix: old turface, D.earth, evergreen bark, and some volcanic rock.


 Here is the tree with a 12oz can as a size reference.  This could be a nice little sumo tree in the future.  I will plan on letting it grow mostly unchecked and repot in 2-3 yrs.


The last images are at the end of the days work after watering the trees.  I wonder how all these large wounds will heal?


Update June 1, 2018 : Disaster struck when a Rottweiler puppy broke into our yard and knocked this tree of my bonsai table.  I was out of soil, so I did my best to collect the soil of the ground and topped it off with compost.  That bastard dog chewed the top right where a bud in the perfect place was just pushing out.  Hopefully it will handle the emergency repot.  


RIP
It didn't !

Siberian elm urban yamadori #2


Siberian Elm - Urban Yamadori  #2


Above is the site.  There were plenty to choose from, yet some were really close to the fence and one was a trunk gut almost to the ground that had responded well, but was 12" in diameter and beyond my scope...I'm glad I passed on it.

Below, you can see why I choose this one to dig up, with one funky zig-zag branch which I planned on being the leader. The vertical growing branch in the back of the image was later pruned due to it crossing around the branch with the interesting movement.


Smooth progress

In the image below, you can see that crossing branch as well as a bunch of messy growth on the left side.  Not many roots to speak of, hopefully it will respond to nice soil, well sealed cuts, and TLC.


Here it is a bit cleaned up.  I didn't worry too much about the knobby and large cuts.  I image that they will become Uro, or hollows in the near future.


I cleaned them up just a bit more, and considered my next move.  There is a lot of potential with this tree but the inverse taper is a significant issue.  The roots were in the lower part of the root structure so I felt that I had to plant it as is.


I have never tried the tourniquet method to correct this type of issue, and thought that I would give it a go.  Basically, the idea is to tightly bind wire around the trunk at the thickest part.  When the tree grows, it will grow into the wire.  The cambium will be affected and the tree will respond by throwing out roots just above the tourniquet.  Then when these roots are established, the old lower roots can be cut.  Below is the placement of the wire. 


I potted it deep so that there was room above the tourniquet for the new roots to develop...hopefully!

This tree could be interesting.  It should stay put for long enough for the tourniquet to take effect and development new radial roots.  I plan on letting it grow unchecked with perhaps a few winter cuts to keep it in shape.

Update:  Here it is with some nice buds on the upper trunk and some suckers on the bottom, which I will cut once the top puts out more shoots. June 2018


Update:  September, 2018 this is the only survivor of that dig.  The large wounds on the upper trunk healed well and the tree grew vigorously, sending up strong leader.  I thinned out some excessive growth an trimmed the leader a bit.